Sep 28, 2012

Optimus Prime Pen on the moon base... Part12-1

12-1 To assemble sound modules, battery socket. 


Due to inside the moon got some metal pieces and wires. To protect the short circuit and to protect the weak point of soldering to crack. I need to cover circuit module by plastic resin, of course it needs 1 set of mold. Let's go...
 

making specimen by covering circuit module with plasticine ~ 1mm. thickness 
is much enough (try not to make more than 1 mm. because our space is very limited.)

also cover edge profile.

to cover the weak points help more reliability.

Make PP board as box above size is 5 mm offset from sound module. 
Making silicone base by poring silicone(hard type) 3 mm thickness.

Once silicone base is completely dry. Cut PP board as slot 2.5mm (size of group of wires) down till 3 mm above silicone base level.

 cut another side (for next wires)

 Place sound module specimen into center of box. Plug slot upper wires.

 Top view

 Now making the 2nd layer (sound module lower half)

 to see the half level.

we're making the upper half. Coat the lower half by vaseline.

Pore the soft type of silicone (3 mm from top of specimen)

wait till silicone is dry (~ 2 hrs.)

Once silicone is completely dry, pore plaster thickness 10 mm.

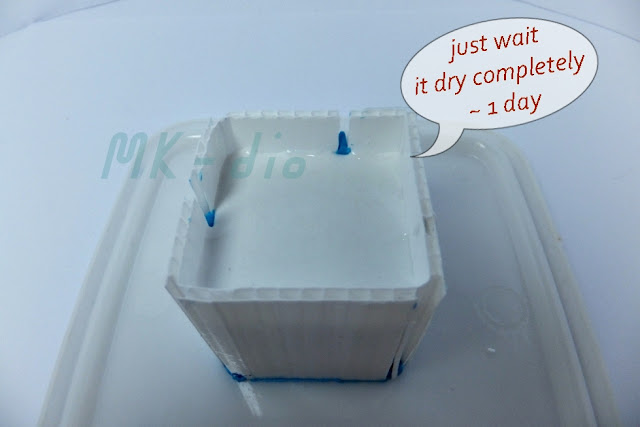
This step needs 1 day to be dry.

finished the mold for sound module. Get ready to make resin of it.

Check the gap all around to see the side of wires and gap.

Pore resin into each side of mold.


place sound module, ensure the group of wires are sit on the right position.

wait till they turn to be jelly, then close the mold. 
Ensure wires are still on the right position.

Now we already have sound module with the insulation 
(to protect short circuit, soldering crack etc.)

This part seems waste time, but it's worth for me. 
It's more reliability for limited of area (inside the moon)

Hope you learned some benefit of this part and enjoy it more or less.
Next part would be "how to fix switches into the moon" and more on soldering steps.
thanks for watching
Bye for now... ^_^

Sep 26, 2012

Optimus Prime Pen on the moon base... Part11-2

11-2 Clone the sattelite receiver & button switch (continue)

Before we make the plastic resin, thinking about the resin is brittle. 
By this shape (very thin) I need reliability. Then I decided to add reinforcement.


Prepare steel wire size 1.5 mm, 40 mm long.

 Before cutting as 40 mm. look at the left end, it needs the angle cut. 
And the right end need little angle too.

 Prepare 1.0 mm steel wire for next reinforcement.

 Drop some super glue, wait it dry. (do not worry if glue drop to silicone
it won't attach silicone at all)

 Drop super glue to another side (by this photo is not correct, I took wrong side ^^) 
Now get ready for resin process.

mix the 3 color (white, yellow, blue) to be close to the moon's color.

Keep pushing brush into grooves and always push resin up on top.


place reinforcement back to mold stably. Cover them with little resin.

Close the mold, wrap it tightly. Wait for 10-12 hrs.

look at the result, for me there is no problem.

After being immersed in Sodium hydroxide for an hour 
(do not leave them for longer, it may loose some detail) Then clean them up.

As we plug this during the process of making mold. So now we need to resume the hole. Start at 1.0 mm, 1.5 mm of drill bit.

resume the previous shape.

This one also need to resume the hole by starting at 1.0 mm --> 1.5mm. --> 1.8 mm. 
(do not jump the drill bit size, it may break)

final hole

Ok now to compare the master and our clone piece by piece.

At the end of the clone do not need resin because of we will plug it into the moon easier.
Which one would you like more ahh??? ^^

 To see the close up.

there is just ok for me. Then we are now finished the clone of Satellite receiver. Then let's make the hole on the moon for it.

Drill 2 holes with 1.5 mm. one for Satellite, one for wire of LED light. 
observe... I make some angle (more nice to me)


I prefer the smaller wires, but I do not have right now, soon will be. 
 Now complete with this part. Let's see the overall.

I fix it as this view, but you can rotate it to front, but I prefer this view. 
It looks more natural. How does it look like? ok? or not?

hope you guys still enjoy on this part.
next part (part12) is to assemble all modules into the moon.

Thanks for watching
Bye for Now! ^o^


Sep 25, 2012

Optimus Prime Pen on the moon base... Part11-1

11-1 Clone the sattelite receiver & button switch

Due to all components have not much different on thickness, so to make them together into one mold is no problem. it's called "family mold"
 

to embed them carefully especially parting line at half part
try to keep them as horizontal.
 
 If there is some gaps, silicone will go in, then big problem. check this carefully.

 dig around red wire for silicone to be set as this profile.

 That point got undercut, if we pore silicone. it won't be pull out. 
So I plugged it with plasticine.
I've just recognize that I've forgot the button switch ^^. Then add it in too.

Wrap it with rectangular PP-board to be ready for poring silicone.

 This takes time for making silicone cover parts as per profile. 
Do not pore silicone fulfill them completely flat 
because you will not be able to take part out. 

it should be something like this. Thinner silicone, better mold.

 After plaster on top is completely dry. unwrap PP-board, trim the exceed silicone. 
It's complete for 1 side of mold.

 remove plasticine from silicone, clean it up.

 This step can't forget, to cover them by vaseline.

use soft type of silicone to make the left side of mold.

use air gun to blow seriously onto hard to reach points, area for silicone set completely.

direction of air gun. This side we can pore silicone as flat without problem.

 After poring plasticine 10 mm.

Check all details, trim all exceed silicone. Then complete mold be ready for resin process.

The resin process will be on next part.

thanks for watching.

Bye for now.... ^o^